To make your iPad mail client work and correctly deliver your emails, you need to configure its SMTP settings.
No wonder that the iPad has become one of the most used tool to send emails on-the-go: its practicality and its beautiful design make it an excellent device for emailing. Remember anyway that if you use a normal SMTP server like the ones that come with your Gmail or Hotmail account, you’ll need to change the configuration any time you change internet connection.
To avoid this trouble you can switch to a professional SMTP service that works with any kind of ISP (and so it’s ideal if you travel a lot and use currently your iPad to check the inbox).
And here’s how to set up an SMTP for your iPad.
1. Select “Settings > Mail, Contacts, Calendars”.
2. Tap the email account from which you want to send emails (or add a new one if it’s the case).
3. Tap “SMTP” under “Outgoing Mail Server”.
4. Tap “Add Server…”. This window will appear:
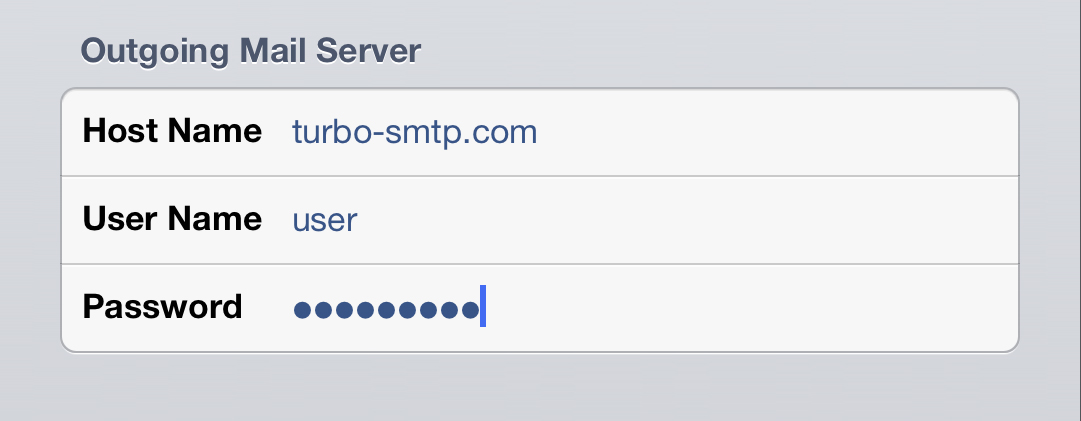
5. Enter the following information:
- Host name: your SMTP server’s name. If you don’t know it, have a look at our list of outgoing server parameters.
- User name: your sending email address.
- Password: the password you chose.
After that the iPad will verify your SMTP, then it will return to the details screen. Select the Primary server and insert all the remaining specifics:
- Server: set “ON”.
- Use SSL: set it off – unless you have enabled an SSL mode on your SMTP server.
- Authentication: tap on it and select “Password”; enter your password.
- Server Port: the default port is 25, but some ISPs block it due to the increasing amount of spam; so you can set another one.
6. Tap “Done” and you’re ready to send emails!